
Back in kindergarten, one of the many activities we were involved in consisted in collecting leaves, roots and flowers to make a plant herbarium. I am still looking at those days as eventful moments, through which we played in the woods and collected the prettiest plant pieces to dry and describe on paper.
Sixteen years later, I attended a Botanics practical lecture by the sea, where the professor (who is a great algal taxonomist) would put a wetsuit on and go pick different species of algae only to explain their morphological characteristics to the class, still wearing the now completely soaked wetsuit in the middle of a particularly windy November. Bravery that is!

I enjoyed that class, for it was one of the first subjects that required an outside excursion and also because I had briefly studied for it a few days before and succeeded in recognising Cystoseira barbata, a brown algae belonging to the order of Fucales.
Last spring I had the opportunity to follow another subject which consisted in picking up the algae ourselves and separating them into different taxonomic groups later on in the lab. At the end of the lab practice, the same professor showed us how to make an algal herbarium.
It goes like this:
- Pick the algae from the shore or shallow waters. (If the species is protected, like in the case of Cystoseira barbata, obviously do not dare to pick it!)
- Place the thalli into a bucket filled with fresh seawater.
- Bring the bucket to the laboratory or room where you have prepared the material for the making of the herbarium beforehand.
- Place the algal thalli from the bucket to a tray filled with, again, fresh seawater.
- Put a thicker paper into the tray, right under your algal thalli. The paper will serve as the base.
- Move the thalli above and separate the branches or parts of it neatly.
- Take the thick paper out of the tray and place it on a yet thicker base, usually a blotter (a highly absorbent paper). Cover the front part where the algae is with a cloth.
- Place another blotter on top and close both sides with thin wood panel. If you have more than one algal species, stack these one on top of the other.
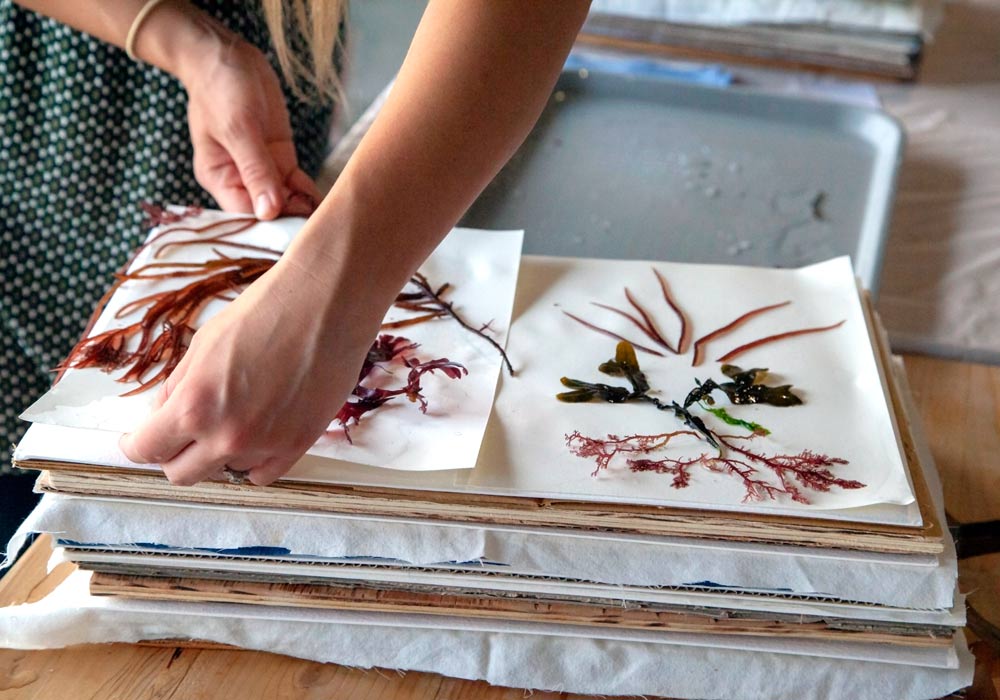
- Place a heavy weight on top of the stacked pile.
- Change all the papers, except the primary thick paper base, every day for as long as it gets dry. Make sure to store everything in a dry place with lots of air flow. Some algae require more time for drying, others less. It might pass a really long time before the herbarium is finished. Be patient and keep changing the papers. Eventually, all the water will be absorbed. What will remain will be a perfectly preserved algal thalli.
- Write down information, such as when, where and by whom was the specimen picked up. Add a short description of the general morphological characteristics.
Et voilà!
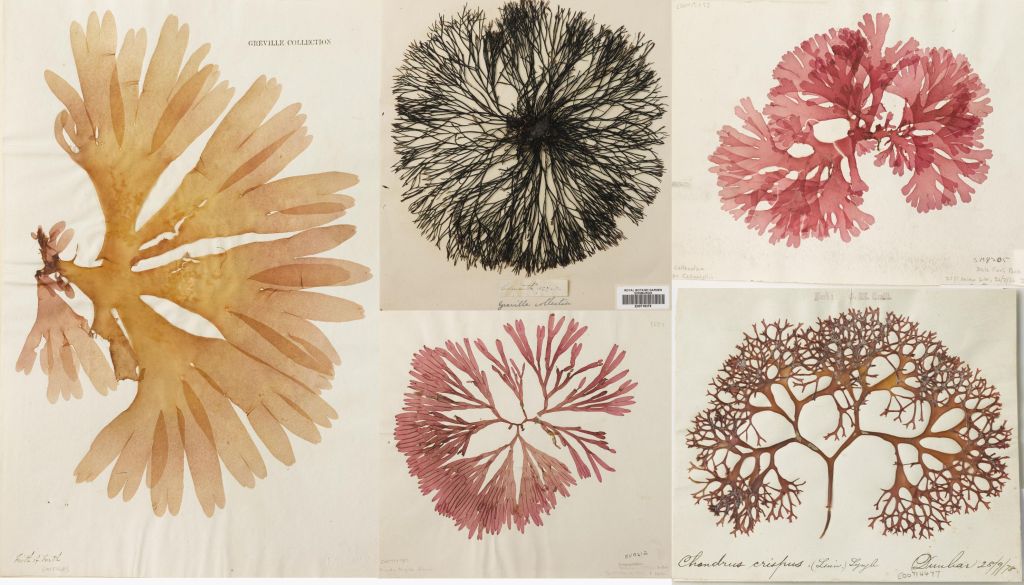
This procedure is quite time consuming and you have to be really consistent with it. Once you have made it though, you have your own little herbarium and yet another thing to place on every biologist’s geek bookshelf.
Have a good one in the process!
